
This semester I knew what i was doing from the start, I had a vision on the holidays and started working on it as soon as semester started.
I plan to do a robotics piece that is a simmulation of what the sky looks like when it storms.
I had a fiew ideas of how I was going to do it
- cover the ceiling of a room in light coloured fabric with lots of valleys and peaks so it has some uneven cloudlike shapes, then project onto this footage of storms and birds. specifially black cockatoos, as where I grew up seeing a black cockatoo meant a storm was coming
- Hanging fabric horizontally on the ceiling with lots of “vents” and then situating fans along side it so that it moves. I also wanted to include a smoke machine, but specifically the ice ones, that make the smoke cling to the ground.
- program robots to lift and raise the fabric and move like a choreagraphed dance to music. set up in a grid formation of 9, so that I can make complex patterns.
- create an elaborate musical piece that extends the water cycle into a journey about moving through death and hard times (my family friend died this semester, it hit me really hard and I wanted to mark this death in a way that i could understood and move through it. I planned to include lots of singing, synthesizer sounds, some cello and hopefully drums.
Meanings and messages:
These were my options and I chose to program the robots using Arduino, a hardware computing system I have fiddled with previously.
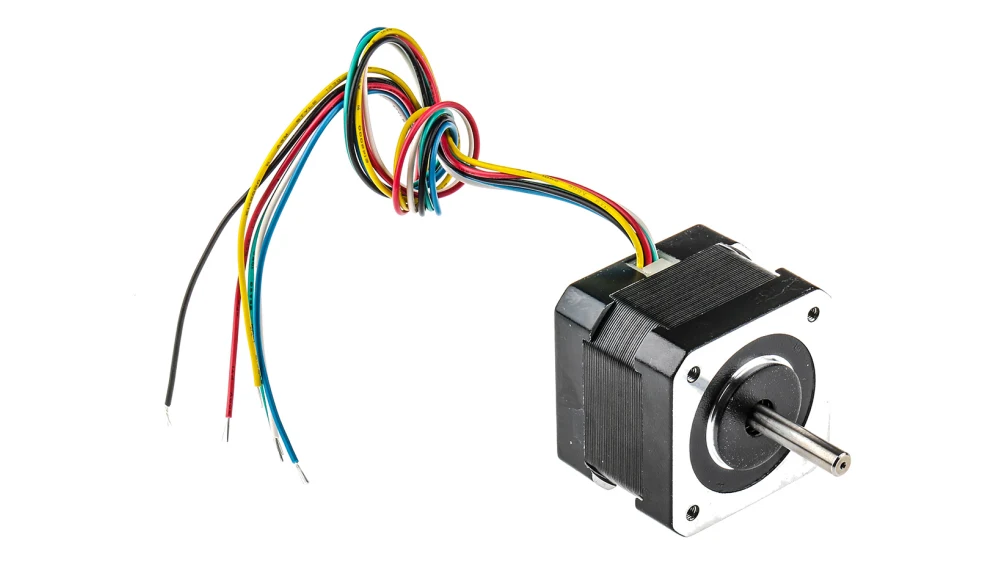
I researched different types of motors and landed on stepper motors, which are very precise and can be controlled down to a half of a degree (as in 360 degrees in a circle, and precision up to 720). It also has very precise speeds, this means I can have the motors chop and change quickly and slowly. these motors are mainly used for 3-d printers.
I then with the assistance of chatgpt, made a shopping list.
- NEMA 17 Stepper Motors
- A4988 Motor Driver Boards (one per motor)
- Arduino Uno or Mega
- 12V Power Supply (for stepper motors)
I went to Jaycar and got everything I could, this is where everything went wrong.
First off it was $150, which if i wanted to make 9 of them it would cost $1350. Which doesnt include the fabric that I would need which would be expensive.
And secondly, because I am writing this after the fact I can save a lot of turmoil.
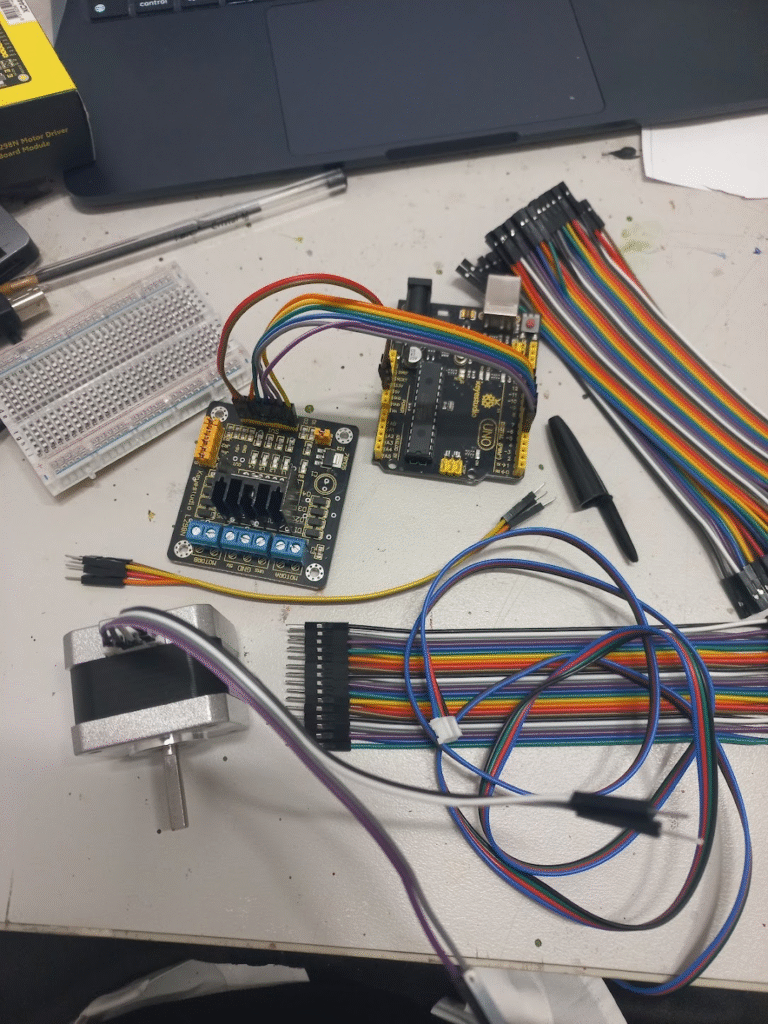
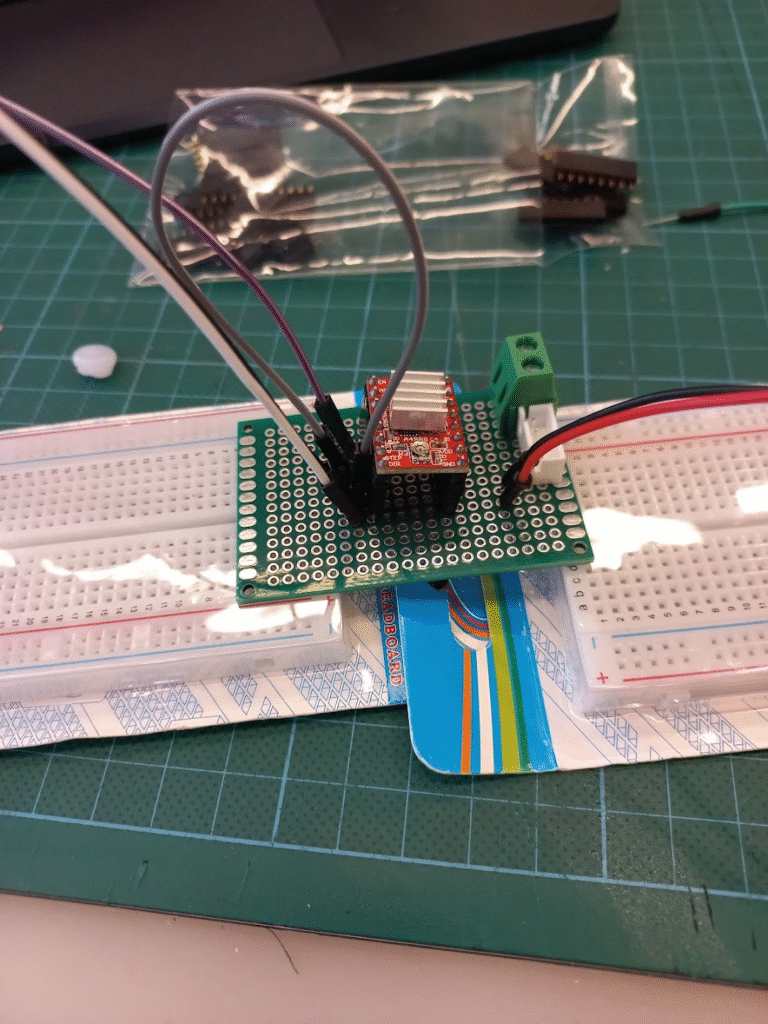
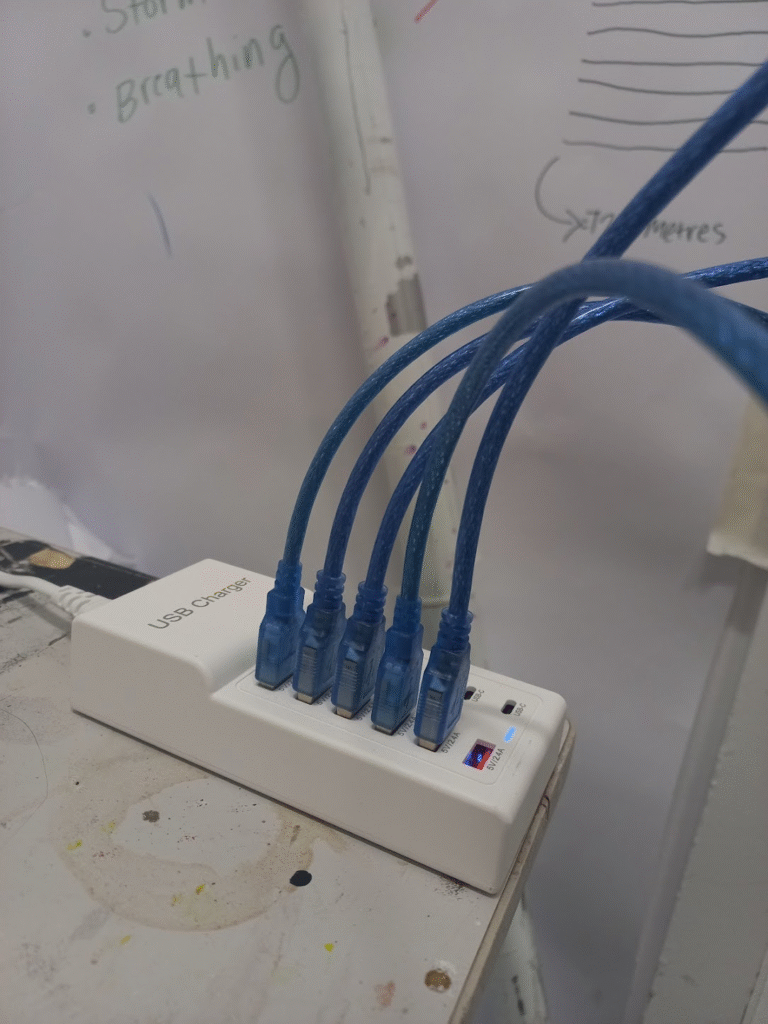
I was looking for the A4988 driver, but Jaycar didnt have it, they suggested the L298N Driver. Which is the one I am connecting in this picture.
I could not for the life of me get the motor working. So I figured I would ask for help, I joined the Mechatronics engineering club and met Jai.
He was helpful in teaching me the basics.
Sadly he was just as clueless as myself. and in some areas pointed me in the wrong direction even though I thought that he was wrong I still listened to him.
I also had another similar reaction with a jaycar employee that told me that I was using the wrong voltage for the stepper motor. He was incorrect, but at this point I figured out how to trust myself and my own research and I ignored him.
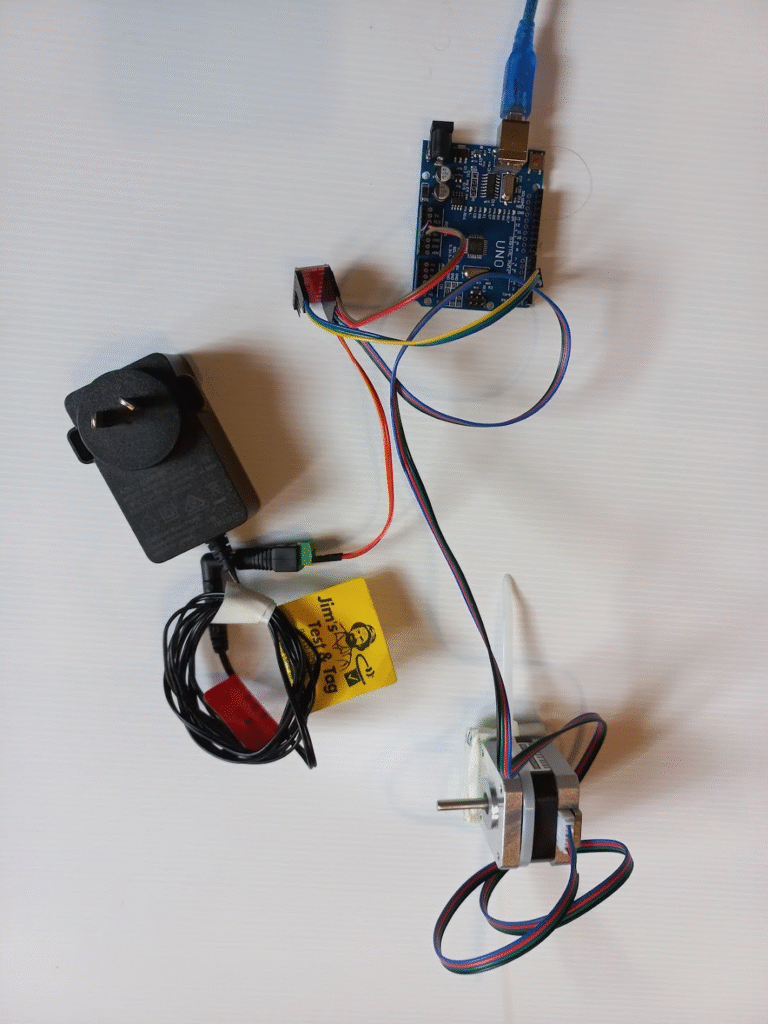
This was 8 weeks of fiddling with nothing working, in the process I shorted my arduino and had to get it replaced. But finally I figured it out, I should have just insisted in the first place that I needed the correct driver, instead of trusting some random.
New Motto; Trust no one, do your own research.
I will now start my own anti-vaxx and engineering movement (joke)
Thus began the actual prototyping, with more than half the semester gone.
I was trying to figure out the physical mechansim to move the string. I initially was going to make a big wheel. Then I chatted to my engineer uncle and he said that the wheel would only be able to pull the string up or down as the same measurement of the circumference, or it will start going back up again. So I moved into a pulley system, the mechanism that turns a curved line into a straight one.
Hooray! It turns on, but my coreflute proto-type is absolutely useless! Lots of issues are going on with things slipping, but I also need a counterweight. when it pulls the string “home” it works, but it has no ability to “push” the string, so it just unravels in the air.
I then, recomended by Isaac found the makers space in the library.
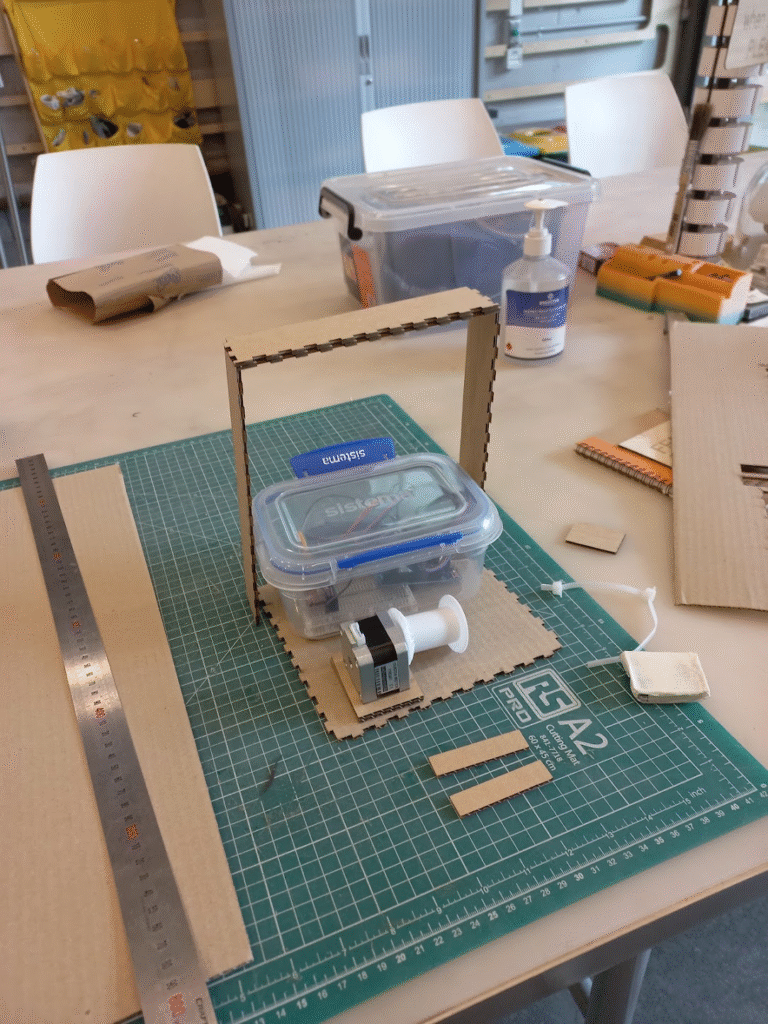
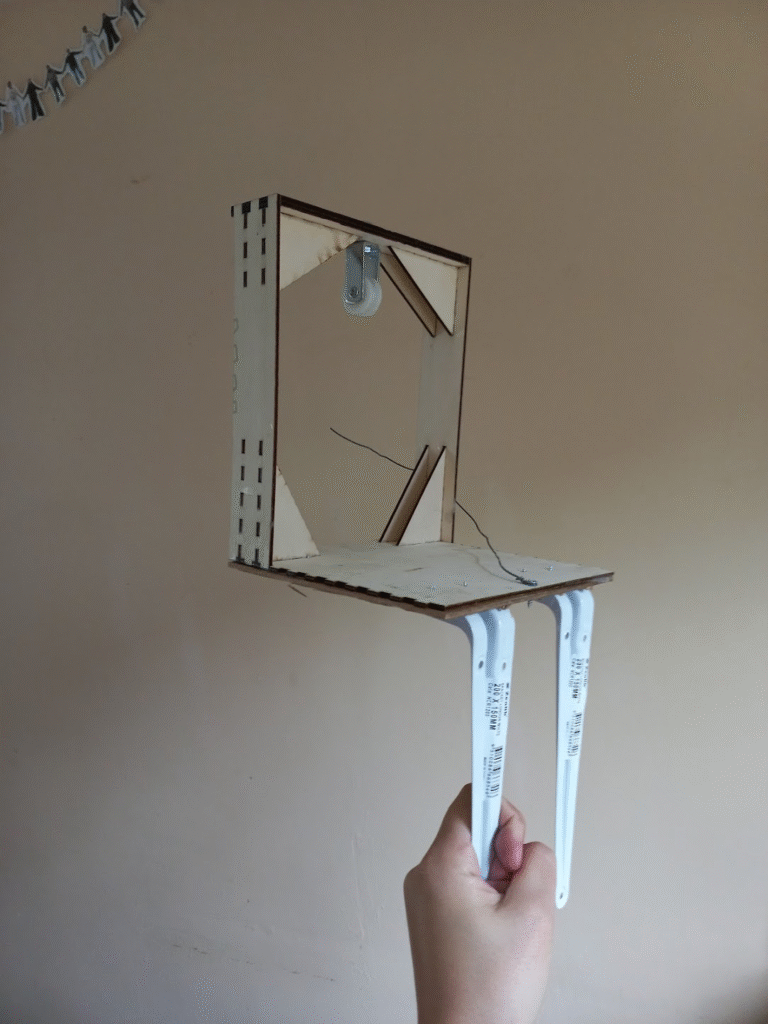
I started by lazer cutting some cardboard to make a practice frame.
It worked well! The square cut outs on the side allow me to glue other wood on to it.
I also made a mount for the motor, with a little divit cut out for its base and two tracks that are glued underneath with an opening where I can run a cable tie. so the wood will all be glued on but the motor will be cable-tied in, incase I need to change it later on.
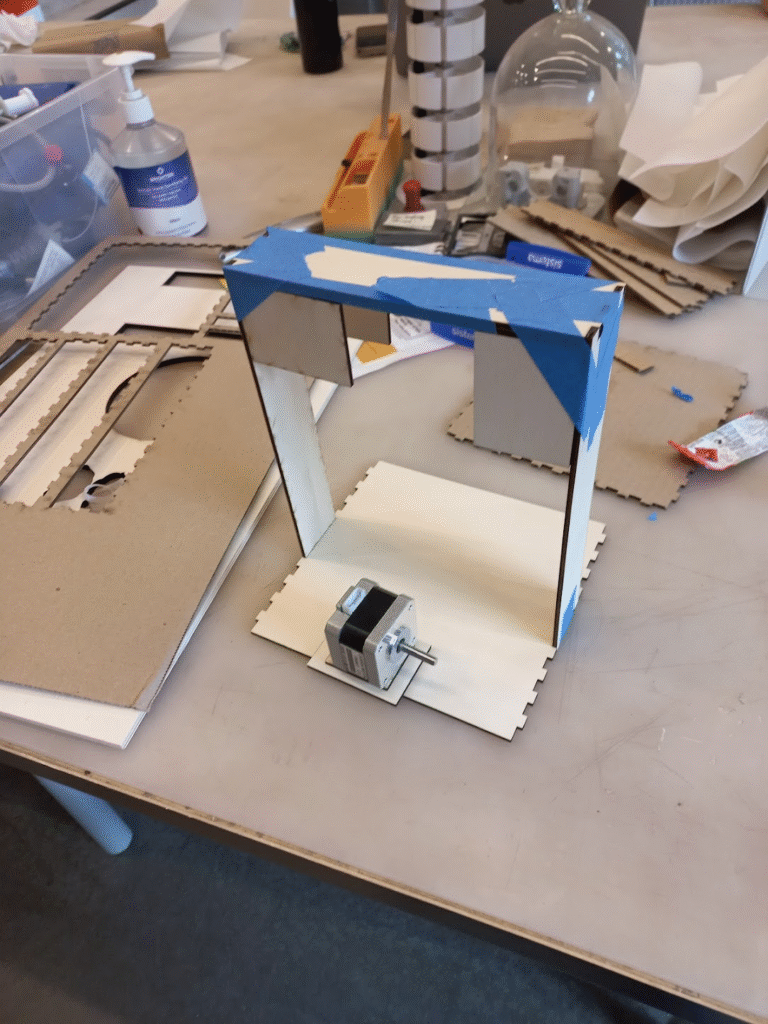
This worked excellently!
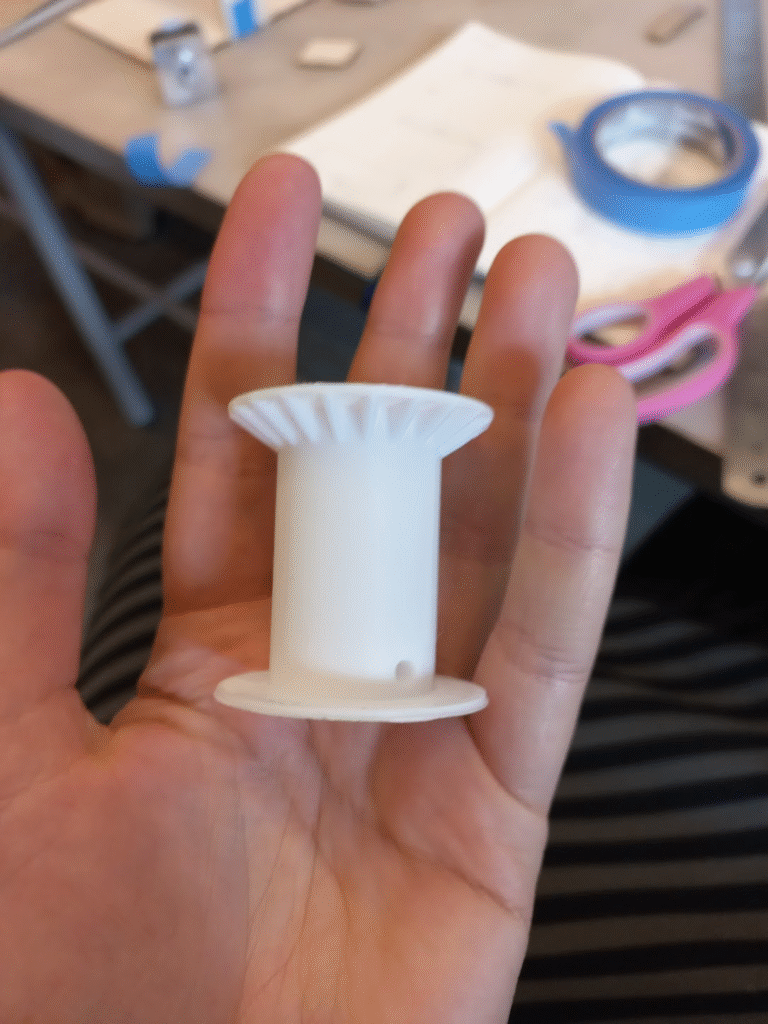
I then found a 3D spool pattern online and printed a basic one to see if it is apropriate.
It worked and I scaled it up to fit the motor.
Now that I had a spool, when i attached it the bottom of the spool hit the mount. So I extended the height of the mount so that the spool could spin freely.
I then laxer cut it out of wood. I removed some of the jagged bits to be less wasteful. I noticed that it was really wobbly and wouldnt hold itself up with woodglue. so I tried adding wood in the corners to stiffen it.
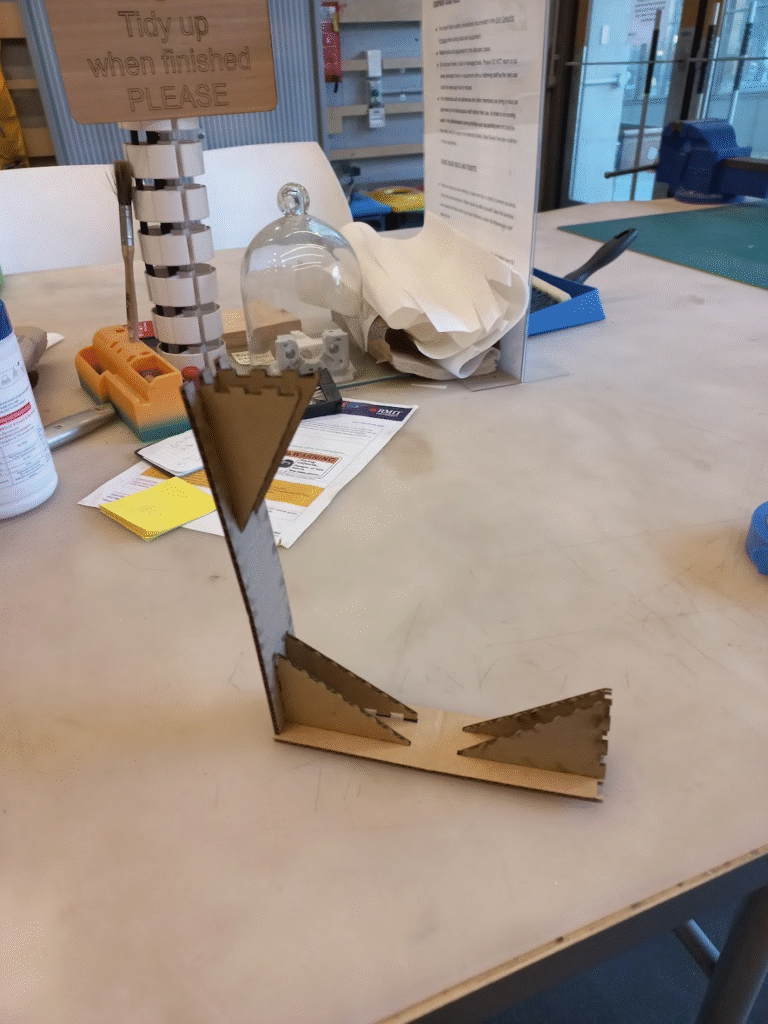
Everything was ready to combine.
I bought a metal pulley from bunnings and hung a small bar for it to loop onto. Which was reinforced with extra wood so I could use normal size screws.
And here it is with the sounds I recorded.
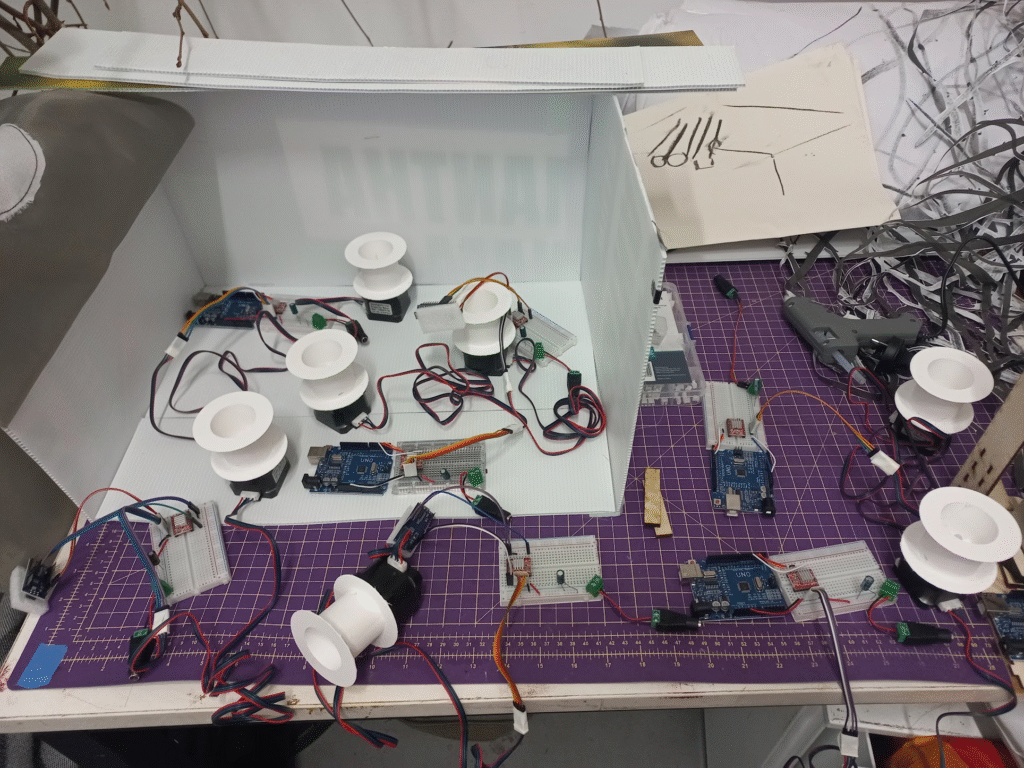
So in the WIL form I discuss the flaws of this excersize. But it was working so i made 8 more.
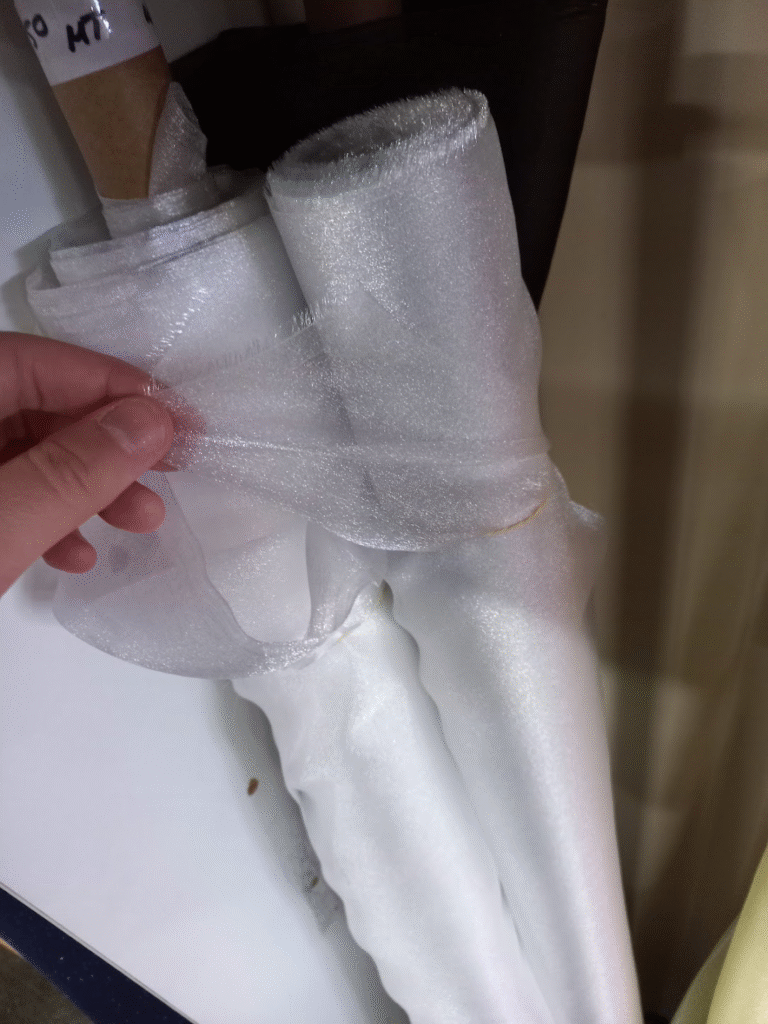
next was fabric sourcing, my factors were budget, weight, colour, and transparency.

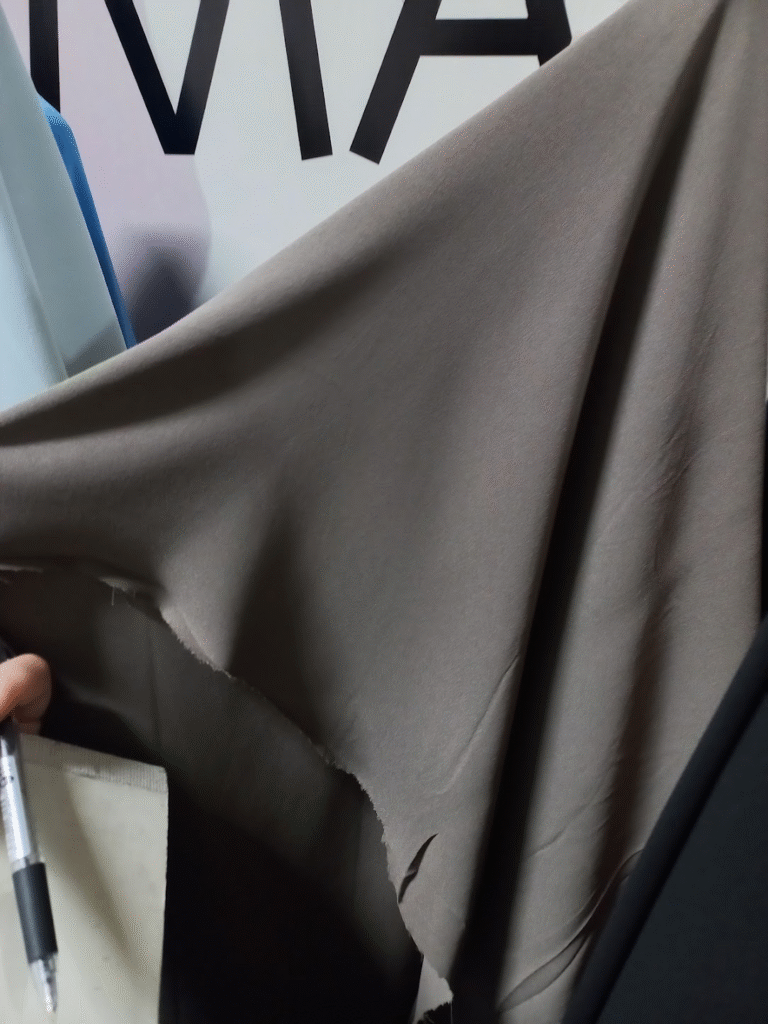
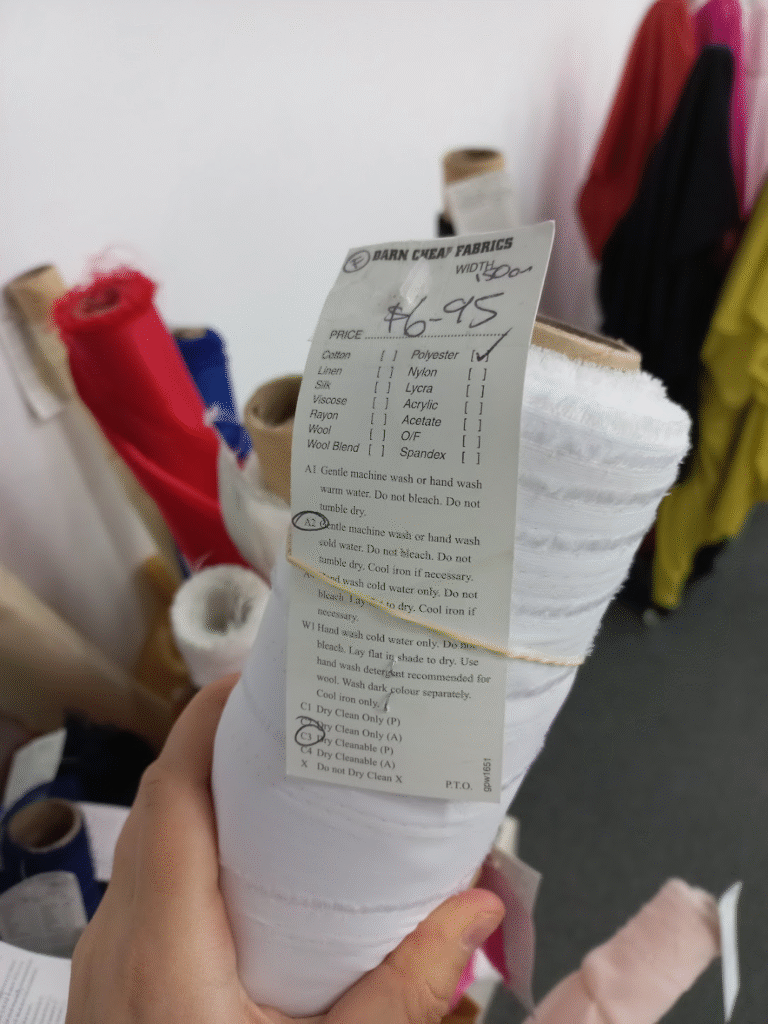
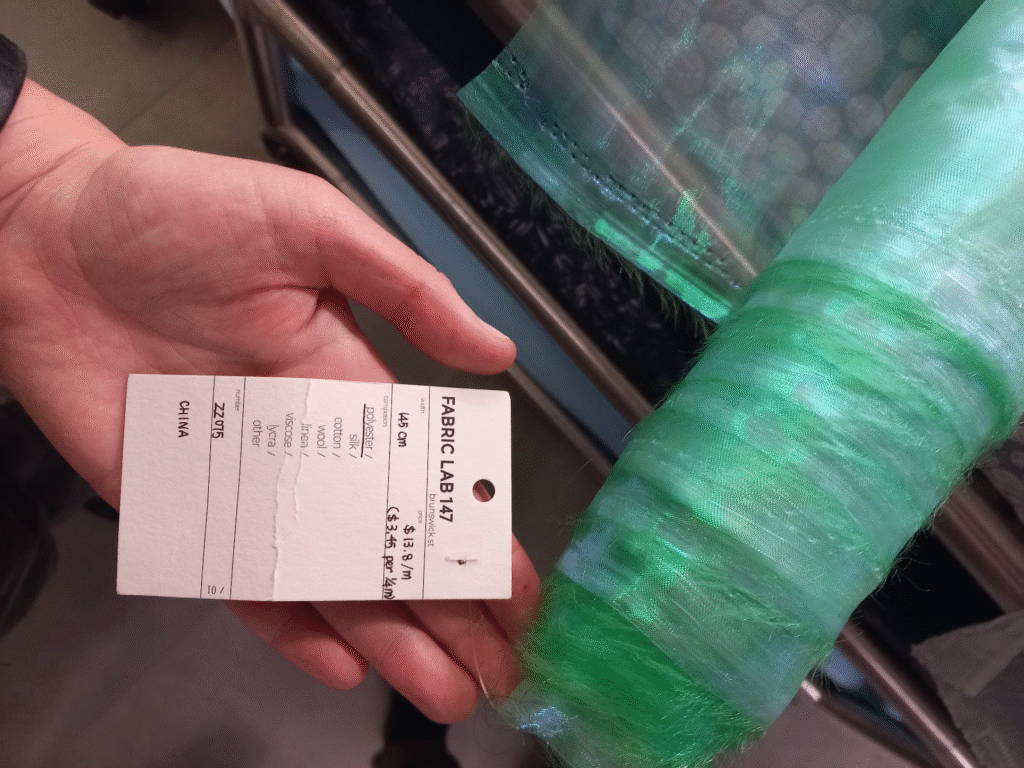
I went to Rathdown remnants in brunswick, and darn cheap fabrics and Fabric lab in Fitzroy. Prices ranged from $7-$14. And i had calculated I needed at least 77 metres to cover the ceiling with some give. Totalling to $539-$1078. Then I found some dark grey lining fabric that was $3 a metre ($231). It was a good cheap option but it was dark and not particularly opaque.
At this point lecturers were urging me to keep the piece simple and ignore the music portion of the piece. I was struggling to write lyrics or find time to write music since this tech stuff was so complicated. So I opted to show the cycle portion of the piece in a different way.
I still wanted music, so i decided to “infuse” the human element of it by recreating the sounds of a rainstorm using only my voice. In a folky choral way.
Here are the recordings I made for the different parts of the piece, I didn’t get to edit these since I had to pivot again later on and this part became redundant 🙁
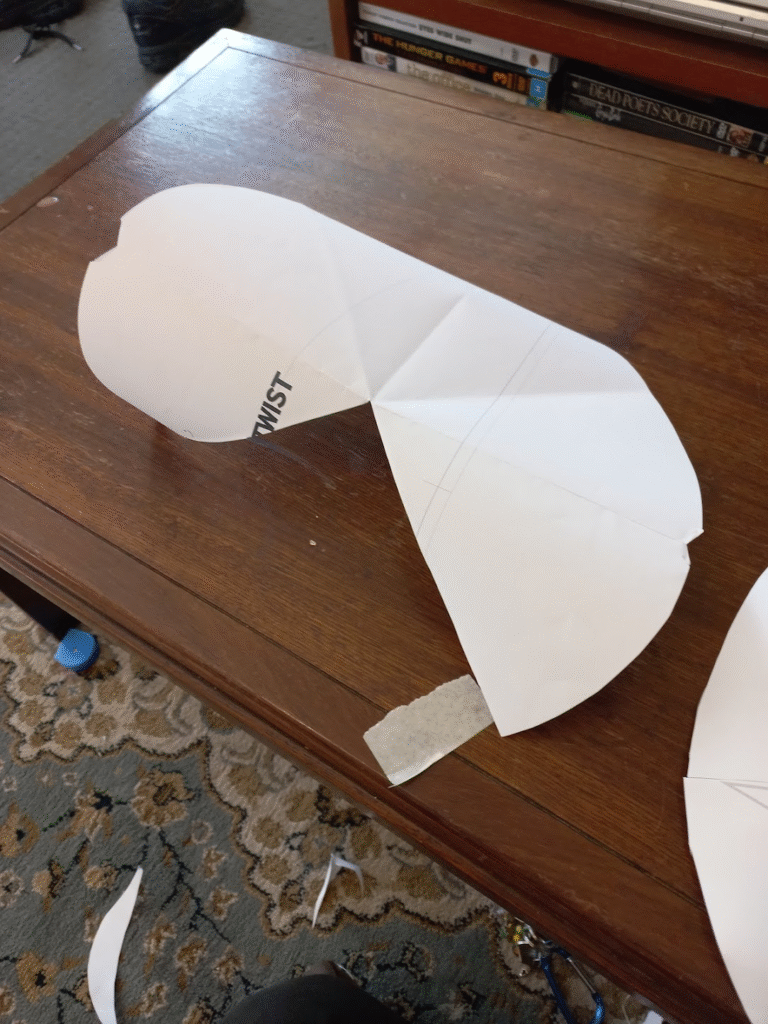
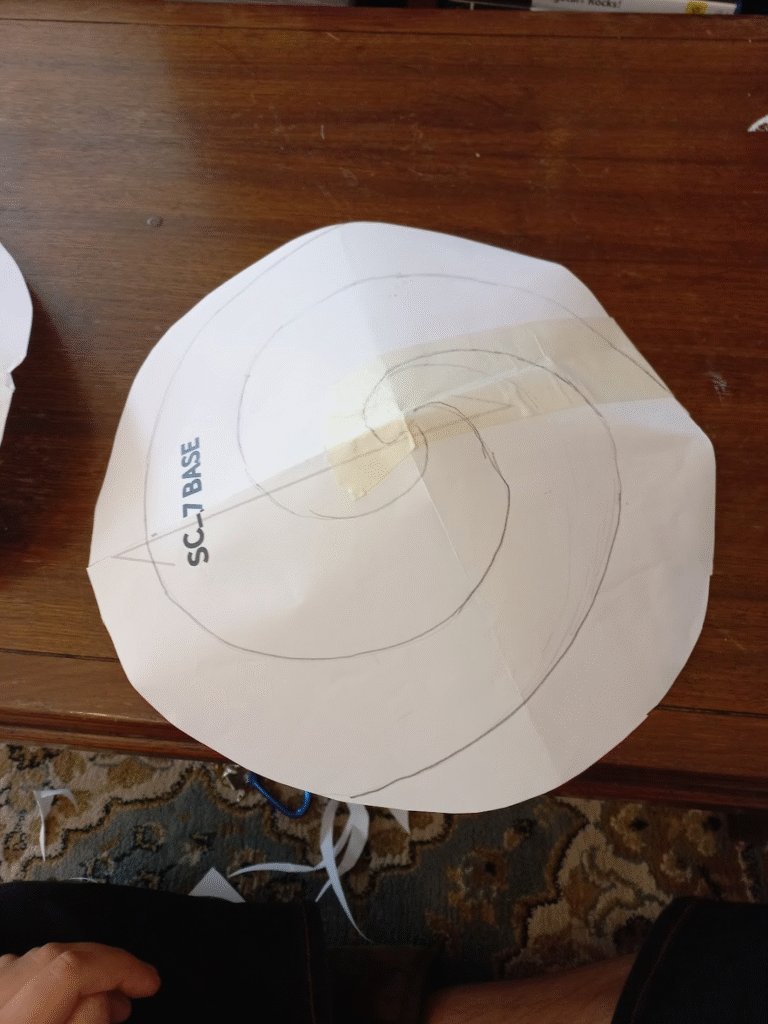
Instead of having the motors forming in a square grid (which i thought looked like hot cross buns) I would have them in a circle. This meant that i could do much more fluid and obvious circle motions and sweeps.
With this dilemna with the fabric price it also meant that I could possibly have 2 different fabrics. The circle being one and the outside (that would be sewn to the circle and then pinned to all the walls) could be the cheaper and darker fabric.
I made a small scale stage of the drawing studio and then tested the idea with samples of the different fabrics. I was really drawn to this two tone fabric idea. A fun consequence of this meant that the two different fabrics had different opacities, where light would be blocked by the outer fabric and shine through the inner fabric. This would be another dramatic highlight.
At this point I had discussed with Andre about installing the piece in the drawing room… ooft, this was difficult. A lot of what I had planned was not possible. I had created my pieces so that i could sit them on top of the beam. Andre said this was not an option as the ladder is too short. I also could only put them on one side of the beam, and i couldnt hang them on any wires.
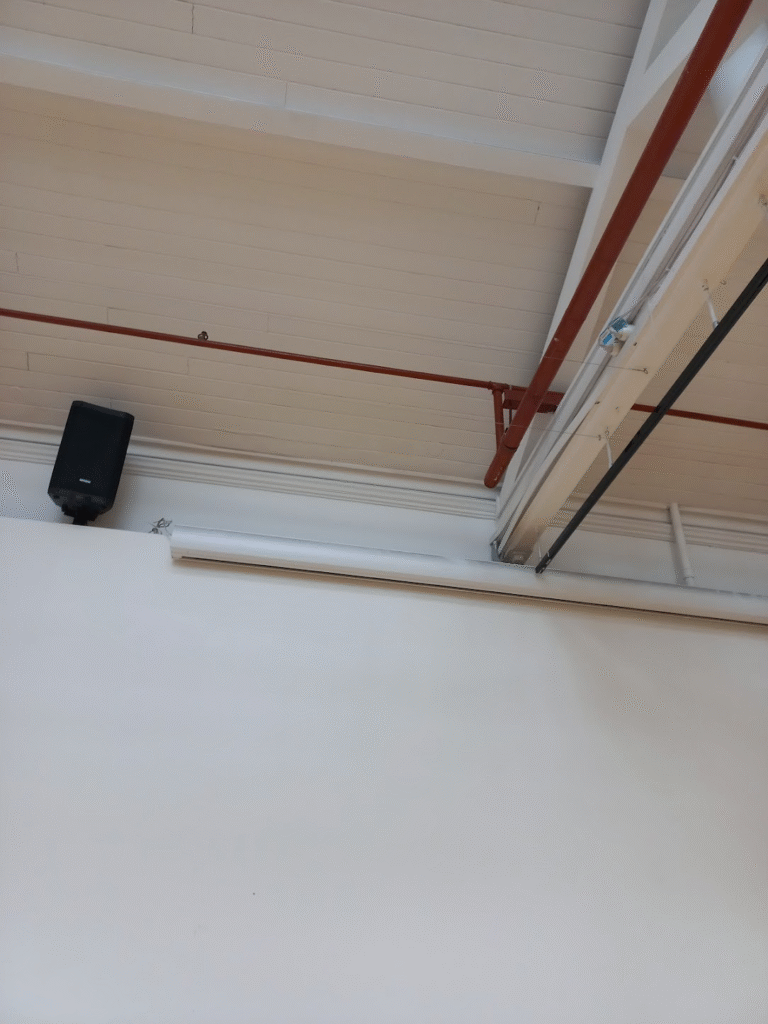
This made things very complicates, I couldnt imagine a way of getting any of the pulley systems to be neat or measured without re-wiring the drawing room ceiling.
The other very scary thing Andre said was the $3 fabric might be considered a fire hazard as it blocks the sprinklers. Other fabric could be okay but because this was tightly woven and could possibly stop water from getting through, it could be not allowed.
…
The idea of me spending an entire semester and hundreds of dollars on this piece all to be told I can’t the day before the grad show by the ohs inspector was scary.
But I had no other plan so i figured out how to “evenly” install the motors along the beam.
I then began making the circular pattern for the inner circle portion, since there was no issue with that part.

I then started making all of the other computer parts. I tried soldering these onto a circuit board, which is less likely to break, smaller, and cheaper.
I tried for about 2 hours to get one soldered but there was just no way it was happening, it was much too fiddly and time was of the essence at this point and there was also no guarantee it was going to work.
So I just bought more breadboards and planned on hot glueing the wires on, so they wouldnt wiggle out under the vibration of the motor.
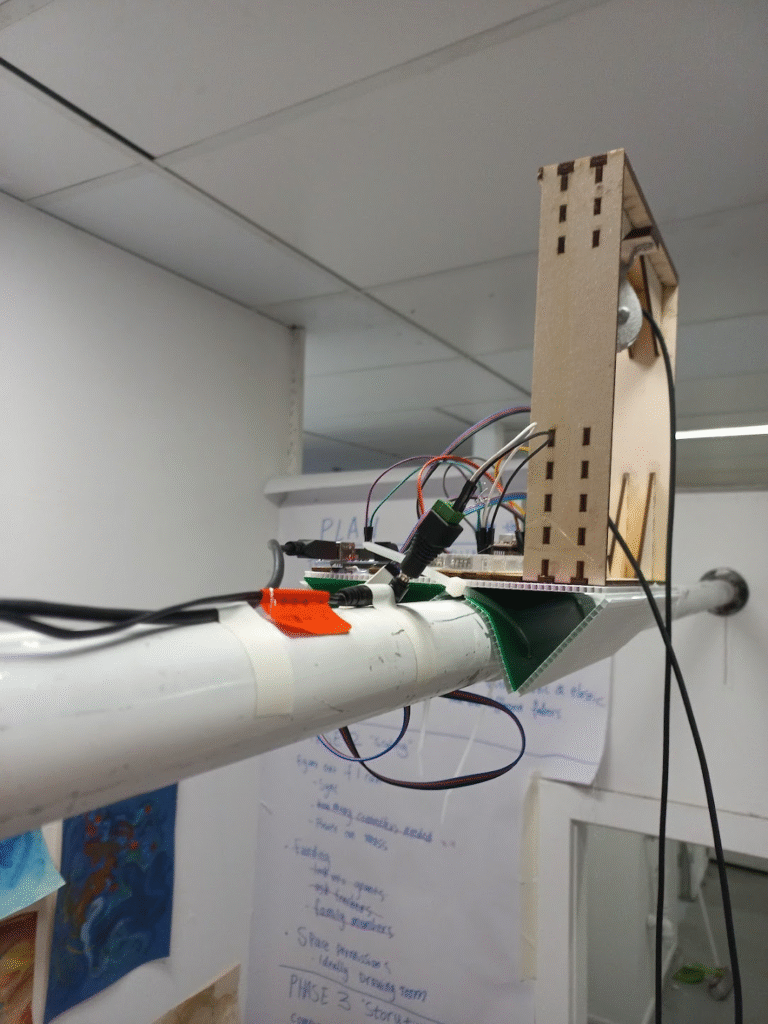
I then figured out how to install the motors on a vertical plane rather than a horizontal one.
I glued an extra layer of plywood with the grain going in the other direction so that it would be stronger and thicker. Because it was only 6mm of plywood I had to use very small screws, `i was worried they could come out so I also glued the brackets on using liquid nails. Since these would be above people’s heads I took no chances.
I also found a different type of pulley, rather one that was fixed. It had a screw in the top, so I had to hacksawy through each one, then make a bolt hole big enough with a drill. This stopped the clanking noise and meant that I could angle the pulley in a permanent way.
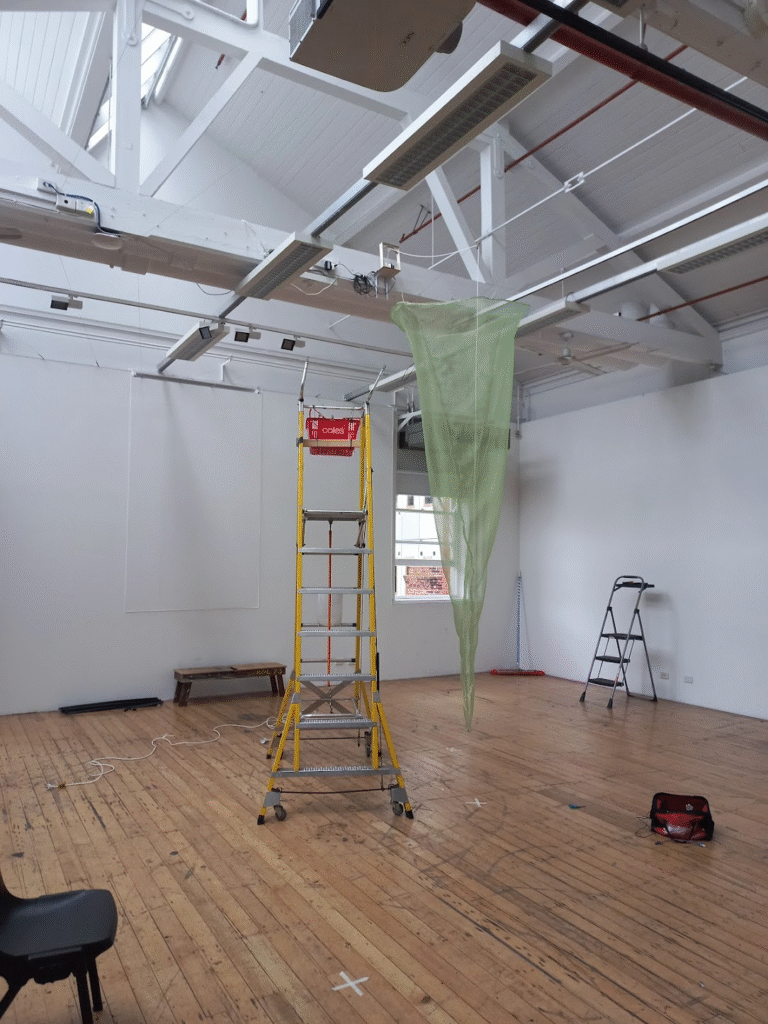
construction time!
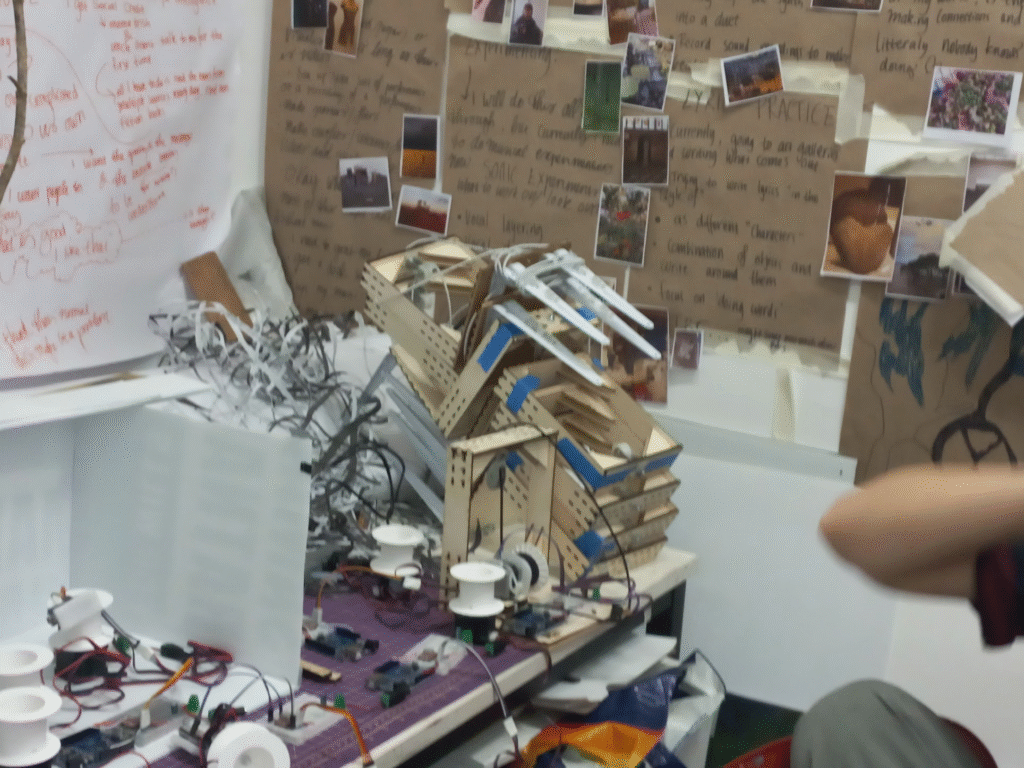
After many makerspace visits, lazercutting, hacksawing, gluing, clamping, screwing and dremmelling.
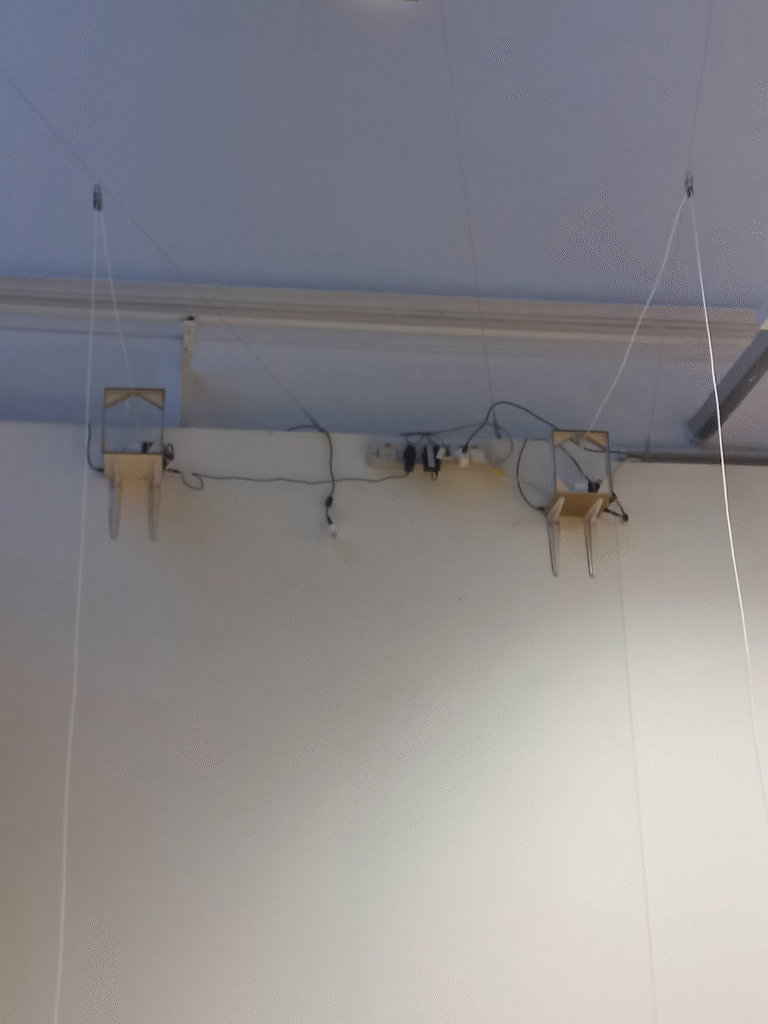
I then glued everything onto the bases and started sourcing power supplies for the motors and computers in each device.
One of my plans to sync the motors is to physically turn them all on at the same time, which if they are on a powerboard should be okay … I havn’t tested this so I am not sure. But I found this power board with the right amount of plugs.
then the next few days before the group tute I was trying to figure out the syncing.
Which involves wiring two wires from each arduino to a “Master arduino” this arduino will then send a syncing signal set from a timer, so that everything stays in line.
I couldnt get this working in time. On paper it was simple but I couldnt figure out why it wasnt working.
In my WIL form I explained what went wrong, and peoples reaction to the piece.
So I had to pivot.
I movedf to use the same robotics but different fabric. Instead of them being centralised and all relying on eachother I will make them independant, so if one goees wrong its only that one.
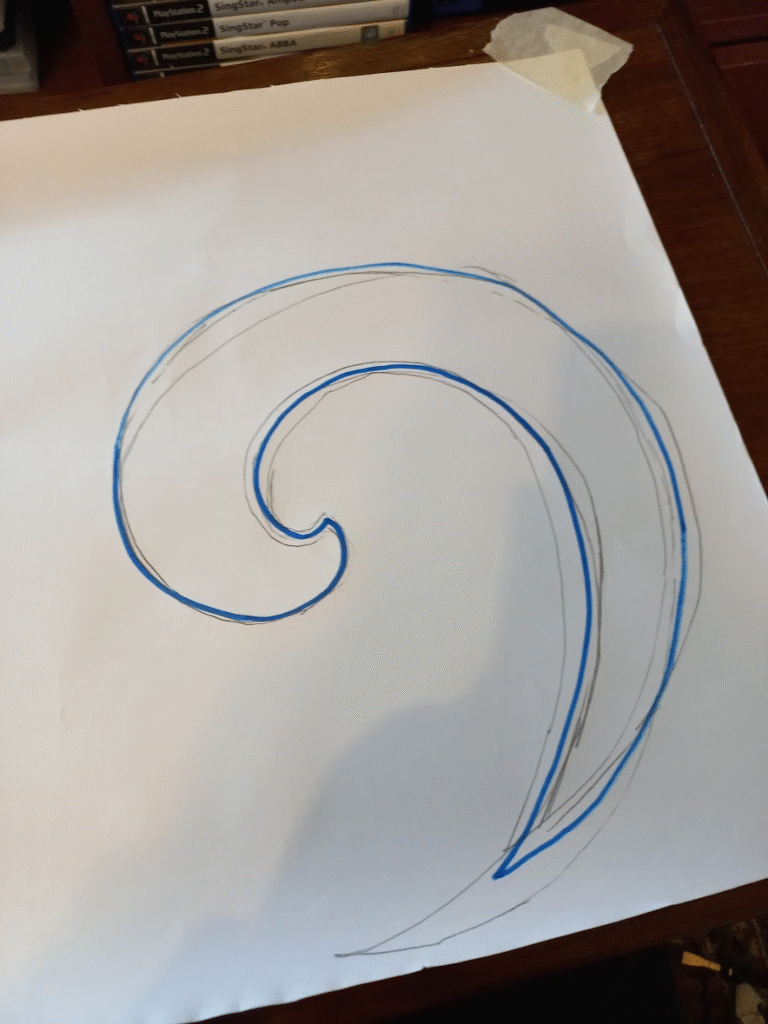
I planned to make these cone type structures that resembled a spiral extended from a flat plane. I wanted it to hang from the ceiling and extend from the floor as if it were stalectites and stalagmites.
I used wire which I wrapped around itself to give it some rigidity since the single wire was much too floppy.
I thought this looked really interesting. I didnt like the pattern it was too long and tubey and now that i am looking at it looks like a weird condom. So I added more fabric so that the top would be wider.
I also noticed that there was a noticible (to me at least) gathering that came from the sewing machine feed dogs unevenly pulling the fabric. I also had to do a french seam to enclose the raw edge since this fabric was very likely to fray. This required so much extra work and made each one take so long.
I talked to some staff at the fabric shops and they said that a copious amount of pins would help. So thats what I did, made 7 more versions with 5 metres of fabric each pinning in 1 inch increments. This took 2 days, and was very labourious.
Luckily i figured out that since this was poleyster organza I could solder the seams and the small amount of plastic melted would protect the seams. This took what would be another 2 day job into a 2 hour job. I wore a respirator the entire time.
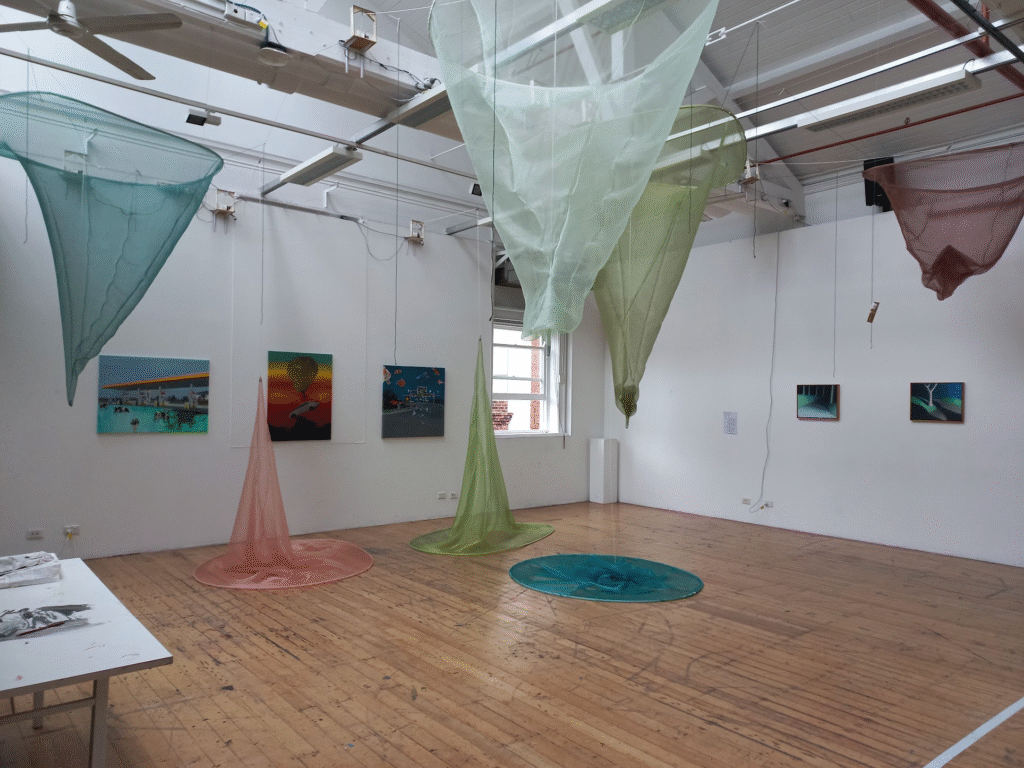
Then began hanging up the motors. Each motor needed two power supplies, so I had to install many power boards. From each motor I attached a pulley on the wires in the drawing room. This meant I could centre the spires on any point as long as there was a wire. I went for a random naturalistic arrangement, makeing sure there were differring heights and also a nice colour balance. I went for this colour pallette beacuase i wanted it to feel naturalistic but not sterotypical, so I gravitated towards colours that would be found in the Australian bush and oceans.
When I installed them I had issues with the counterbalance. So I sourced some bolts and put them around the string. This worked excellently. I also had an issue where the tip of the spires where being caught on the fabric, I tried strengthening the tips with fishing line, looked into using wire. But I figured out that if I sew the edge of the fabirc near the bottom to the cord it wouldnt invert and get itself stuck. Which was a great solution because it was quick and I didnt need to buy anymore things.
There were a few issues the night before the install, I realised one of the motors was underpowered and wasnt working. So I found a power supply that had more amps. One of the machines had a physical probem where the spool was rubbing against the stand, so i jimmied it out the way and it began running again.
I coded each motor for the slightly different heights they were, and the speed they were moving.
Because speed and pitch correlate, the ones I coded to be faster had a higher pitch and the ones coded to be slower had a lower pitch. This resulted in a beautiful harmonic symphony !!! Everyone told me to keep the machine noise, I am glad that I listened to them (apart from some minor adjustments, which makes for the sound to be more beautiful)
I am pretty happy, I worked my butt off on this and dont think I physically could of spent any more time on it. There is a lot of things that happened that I havn’t included here because it would have taken too much time. A lot more failures I am too sore to discuss.
This is a piece I am incredibly proud, almost every facet of this is out of my skill level and I had to do a lot of learning and “its about the journey not the destination” mantras. That being said, the final piece is captivating and gets people to look for an extended period of time, which honestly is a pretty big goal of mine. I think I could work on some of the sewing elements, I really should have ironed it or at least steamed it. For the gradshow I will definitely be doing this. I think this is a great first baby step into the big wide world and I am excited to make more things, so `i can look back on this as a time capsule of my skills.
Here is some of my research and coding trials.